>>
30-MINUTE MEALS! Get the email series now →


A playful mashup of a smashed burger and a golden quesadilla — seasoned beef pressed into a tortilla with melty cheese and classic burger toppings for a weeknight favorite.

This recipe is my answer to those nights when I want burger night energy but less fuss. I first stumbled onto the idea during a late-night cooking experiment: I had ground beef, flour tortillas, and a stubborn craving for something crispy and cheesy. Pressing seasoned beef directly onto a tortilla felt like a small act of rebellion against the usual sandwich routine, and the result was so good that it immediately earned a spot in our rotation. The textures are the main thrill here: a thin, crispy exterior, a slightly caramelized, intensely flavored beef layer, and a molten interior of cheese that pulls in thick strings with every bite.
What makes this version special is the combination of technique and nostalgia. I love the way the beef browns when smashed flat — you get more surface contact, more Maillard reaction, and a concentrated beef flavor similar to favorite fast-food smashburgers. Tucked inside a tortilla and finished until golden, it becomes portable, fun to share, and endlessly customizable. We’ve served these at casual family dinners and busy game nights; they disappear. If you like hands-on, fast, and unfussy comfort food with great contrasts — crispy edges, juicy seasoned meat, and gooey cheese — this will become one of your go-to fixes.
My family’s reaction the first time I made these was immediate: wide eyes and audible approval. My partner declared them more dangerous than a late-night taco run, and my kids loved building them with pickles and burger sauce. Over time I refined the seasonings and the pressing technique; small adjustments — like seasoning the meat generously and cooking beef side down first — make the difference between good and memorable.

My favorite aspect of the dish is its immediacy: you get restaurant-style browned beef and melty cheese in under 20 minutes. Every time I make a batch for friends, someone inevitably asks for the recipe. I love watching people pile on pickles and sauce; it’s a small joy that elevates a simple combination into something celebratory and nostalgic.

Store cooled leftovers in an airtight container in the refrigerator for up to 3 days. To re-crisp, heat a skillet over medium heat, add a small pat of butter or a few sprays of oil, and warm each wedge for 1–2 minutes per side until heated through and crisp again. For longer storage, flash-freeze individual assembled quesadillas on a baking sheet, wrap tightly in foil or plastic wrap, and transfer to a freezer bag for up to 2 months. Reheat from frozen in a 375°F oven for 12–15 minutes, flipping halfway, until hot and crisp.
Want to switch things up? Substitute ground turkey or chicken for a leaner option, but brown a little butter or oil in the pan to compensate for lost fat and prevent dryness. For a vegetarian option, use crumbled firm tofu, tempeh, or a plant-based ground beef alternative; season well and add a splash of soy sauce for umami. Swap flour tortillas for corn tortillas for a different texture — cook more gently as they can tear — or use gluten-free tortillas if needed. For dairy-free, choose a meltable plant-based cheese and increase seasoning for depth.
Serve wedges with classic burger accompaniments: dill pickles, diced white onion, and a burger sauce made from equal parts mayonnaise and ketchup with a dash of Worcestershire. For a fresher plate, pair with a simple slaw of shredded cabbage, lemon juice, and a pinch of sugar to cut through the richness. These also work as a party snack — cut into smaller triangles for a finger-food approach and set out multiple dipping sauces like spicy mayo, mustard, or BBQ sauce.
The mashup is a modern, playful take on two beloved comfort foods: the American smashburger and the Mexican quesadilla. Smash-style burgers emphasize thin, flattened patties to maximize browning and crust, while quesadillas are a traditional folded tortilla filled with cheese and other ingredients. Combining them reflects contemporary kitchen creativity where familiar formats are blended to make something new and shareable. It’s part of a larger trend of comfort-food hybridization seen in casual dining and home kitchens.
In summer, add grilled corn and a spoonful of fresh pico de gallo inside the quesadilla for brightness. In winter, fold in caramelized onions or sautéed mushrooms with the beef to add depth. For holiday gatherings, offer a build-your-own station with multiple cheeses, pickled vegetables, and flavored aiolis so guests can customize. The concept scales well for warm-weather barbecues or cozy cold-night comfort menus.
Cook and season the beef ahead and refrigerate in a shallow container for up to 3 days. When ready, assemble and cook tortillas to order for best texture. Alternatively, assemble and flash-freeze fully formed quesadillas on a tray; once frozen, stack and store with parchment between layers. Reheat in a skillet or oven to retain crispness and avoid sogginess that sometimes occurs with microwaving.
This mashup brings comfort, speed, and joy to the table. Whether you’re feeding hungry kids, hosting a casual crowd, or craving a quick, satisfying dinner, these smashed beef and cheese quesadillas are ready to deliver. Grab your favorite sauce, warm your skillet, and enjoy the crackle of a perfectly crisp edge and the pull of molten cheese — it’s simple fun that never gets old.
Press the beef flat to maximize browning and flavor; a thin patty cooks quickly and crisps well.
Use 80/20 ground beef for the best balance of juiciness and browning; leaner meat will be drier.
Re-crisp leftovers in a skillet with a little butter or oil rather than microwaving to retain texture.
Let folded quesadillas rest 1 minute before slicing to keep cheese from running out.
This nourishing smashburger quesadillas recipe is sure to be a staple in your kitchen. Enjoy every moist, high protein slice — it is perfect for breakfast or as a wholesome snack any time.
Store leftovers in the refrigerator for up to 3 days; reheat in a skillet for best crispness.
Yes — use gluten-free tortillas and dairy-free cheese; cook gently to avoid tearing.
This Smashburger Quesadillas recipe makes perfectly juicy, tender, and flavorful steak every time! Serve with potatoes and a side salad for an unforgettable dinner in under 30 minutes.
Heat a cast-iron skillet or heavy nonstick pan over medium-high heat for 3–5 minutes until hot.
Divide the ground beef into four 4-ounce portions and season each with 1/4 tsp salt, 1/8 tsp pepper, and a pinch of garlic powder, or season evenly as preferred.
Place a small handful of seasoned beef on one half of each tortilla and press flat with a spatula until it forms a thin patty covering the tortilla half.
Place assembled tortillas meat-side down in the hot skillet and cook 2–3 minutes until deeply golden and browned without moving.
Flip each tortilla, sprinkle roughly 1/4 cup cheese over the cooked meat, fold the tortilla in half, and press gently to help the cheese melt.
Cook folded quesadillas 1–2 minutes per side until both sides are golden-brown and the cheese is fully melted. Remove, rest 1 minute, then slice and serve.
Last Step: Please leave a rating and comment letting us know how you liked this recipe! This helps our business to thrive and continue providing free, high-quality recipes for you.
Leave a comment & rating below or tag
@homecookbites on social media!
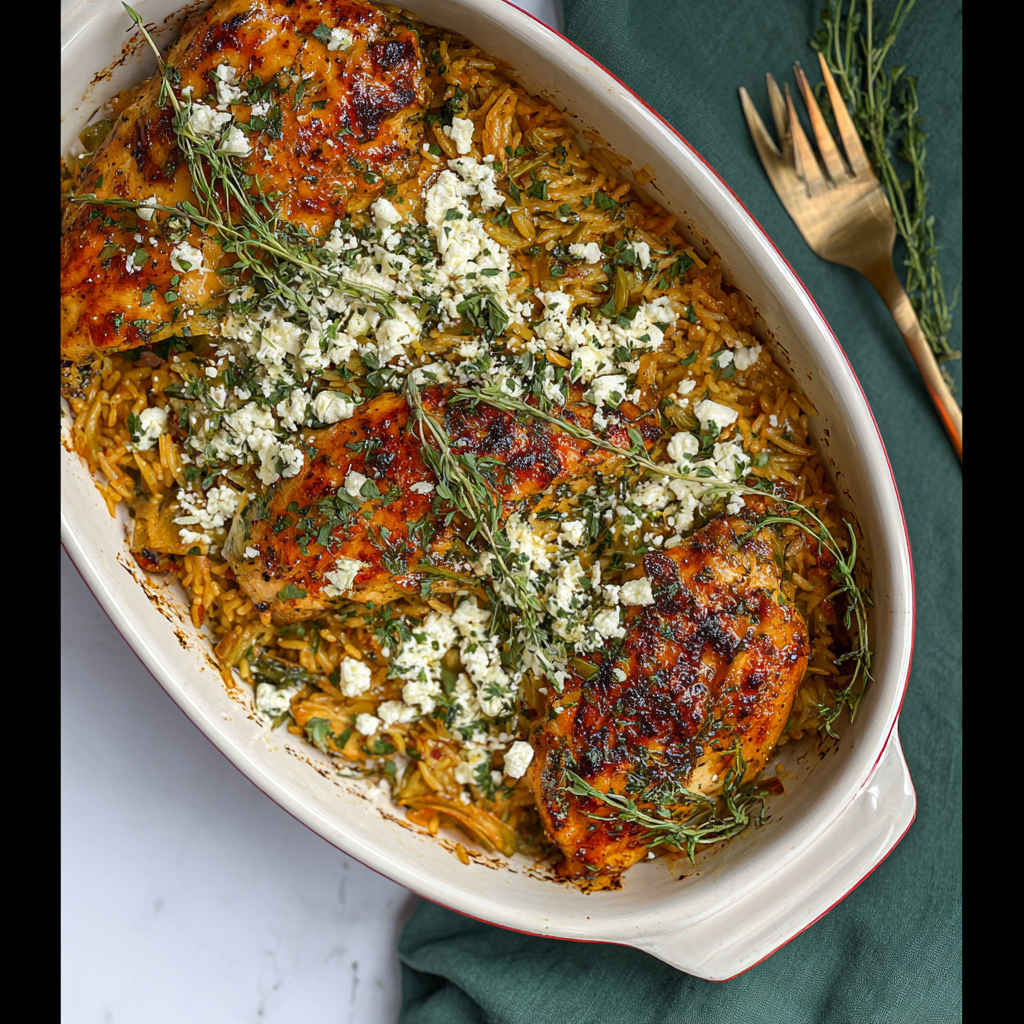
A comforting one-pan meal of tender chicken roasted in herb butter over fragrant jasmine rice pilaf — effortless prep and big fall flavors.

Golden, fried pockets of creamy cheesecake tucked inside flaky biscuit dough, rolled in sugar and finished with a tuft of fluffy cotton candy — a playful dessert that’s perfect for parties and special occasions.
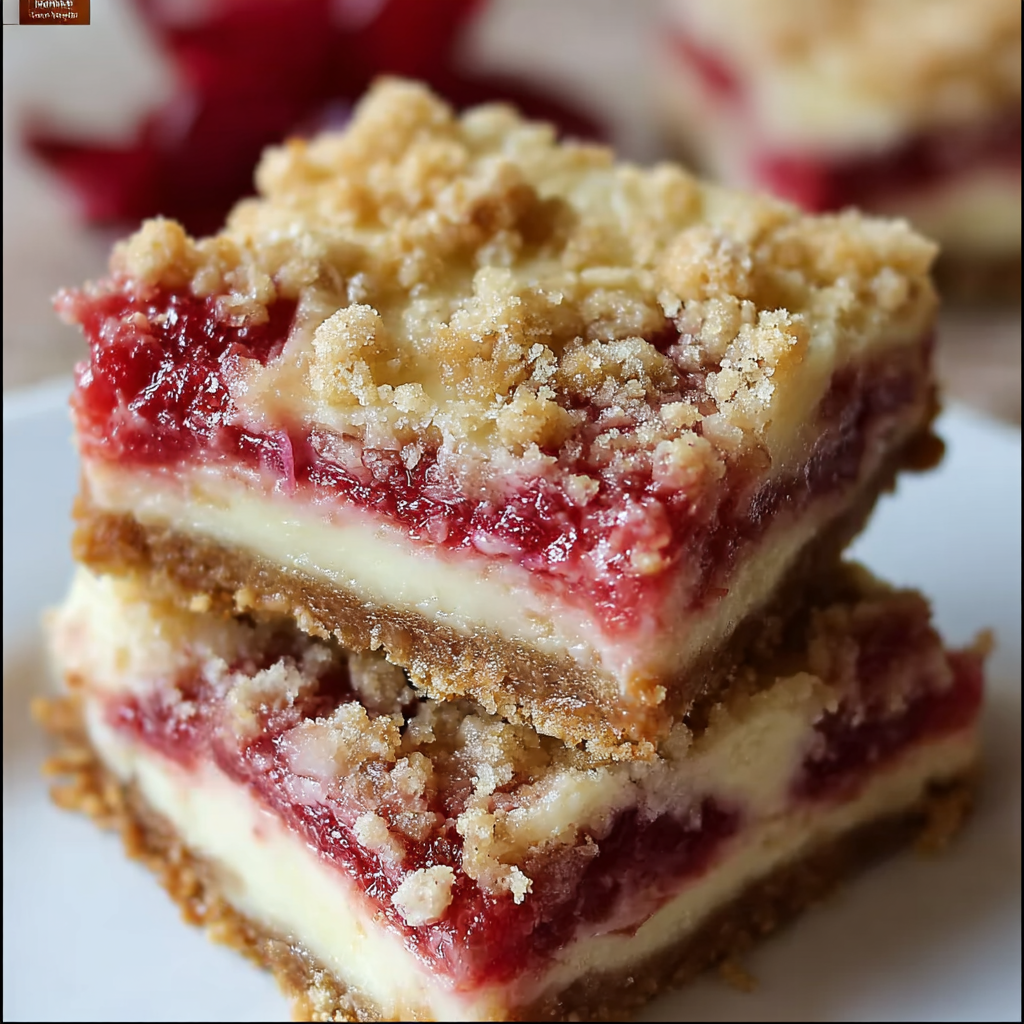
Buttery oat crust layered with smooth cheesecake, bright rhubarb filling, and a crunchy pecan crumble — a nostalgic sweet-tart bar perfect for spring and summer gatherings.
Leave a comment & rating below or tag @homecookbites on social media!
Enjoyed this recipe? Share it with friends and family, and don't forget to leave a review!
This recipe looks amazing! Can't wait to try it.
Comments are stored locally in your browser. Server comments are displayed alongside your local comments.
Quick and easy dinner ideas delivered to your inbox.